January might feel quiet in the garden, but it’s one of the best times to prepare your polytunnel for the growing season ahead. With crops cleared and growth slowed right down, it’s the perfect moment to reset the space, tackle weeds, and improve soil health, all without digging.
In this post, we’re walking through how we prepared an EasyBuild polytunnel in mid-winter using the No Dig method, focusing on simple, practical steps that set things up nicely for spring.
🎥 Watch the full video below, then read on for a breakdown of the process.
Why Use the No Dig Method in a Polytunnel?
No Dig is all about working with the soil rather than against it. Instead of turning everything over each year, you build fertility from the top down.
In a polytunnel, No Dig works particularly well because:
- Weeds are easier to suppress under cover
- Soil structure stays intact and improves over time
- You can get beds ready earlier in the year
- It’s quicker, cleaner, and far less disruptive
January is ideal because weed growth is minimal, moisture levels are manageable, and there’s time to let everything settle before planting begins.
Step 1: Clearing the Tunnel Back to Bare Ground
The first job was a full clear-out:
- Old cardboard from the previous season removed
- Tomato plants and leftover crops taken out
- Grass edges trimmed back
- General tidy to get back to bare ground
This reset makes it much easier to see what you’re working with, especially around the edges, where weeds tend to creep in first.
A small but important note from the video:
When working inside a polytunnel, take extra care with stakes and tools. It’s surprisingly easy to catch the polythene if you’re rushing.
Step 2: Planning the Bed Layout
Because this is a smaller tunnel, we decided against a central bed. Instead, the layout focuses on:
- Wide beds down both sides
- A bed running around the back gable end
- A clear path down the middle
This creates a U-shaped growing area, maximising usable space without making things feel cramped.
The rear PVC zip door isn’t used much on this tunnel, so it effectively becomes a blank gable end, perfect for running beds right around it.
Step 3: Levelling and Edge Prep
Before laying cardboard, we took time to:
- Knock back any high spots
- Fill low areas with compost so the cardboard sits flat
- Remove a few deep-rooted weeds
- Tidy the perimeter of the polytunnel
Edges are always the problem areas, so this step makes a big difference long-term.
Step 4: Laying Cardboard (The No Dig Base)
Cardboard forms the foundation of the No Dig method here.
Key points from the process:
- Remove all tape and labels
- Overlap sheets generously
- Push cardboard right into the edges
- Make sure it sits flat against the soil
You can already see in the video how effective previous cardboard layers had been at suppressing grass and weeds, even in sections that hadn’t been planted.
Once laid, the cardboard was watered in to help it settle and start breaking down.

Step 5: Adding Compost (and Underestimating It)
Next came the compost layer:
- Home-made compost went down first
- Shop-bought compost was planned to finish the job
In reality… we underestimated how much compost we’d need.
One side and the back run of the U-shaped bed were completed, with the second side partly finished before materials ran out. Rather than rushing it, the sensible call was to stop and finish it properly another day.
That’s one of the benefits of No Dig, you can pause and pick things up again without undoing your work.
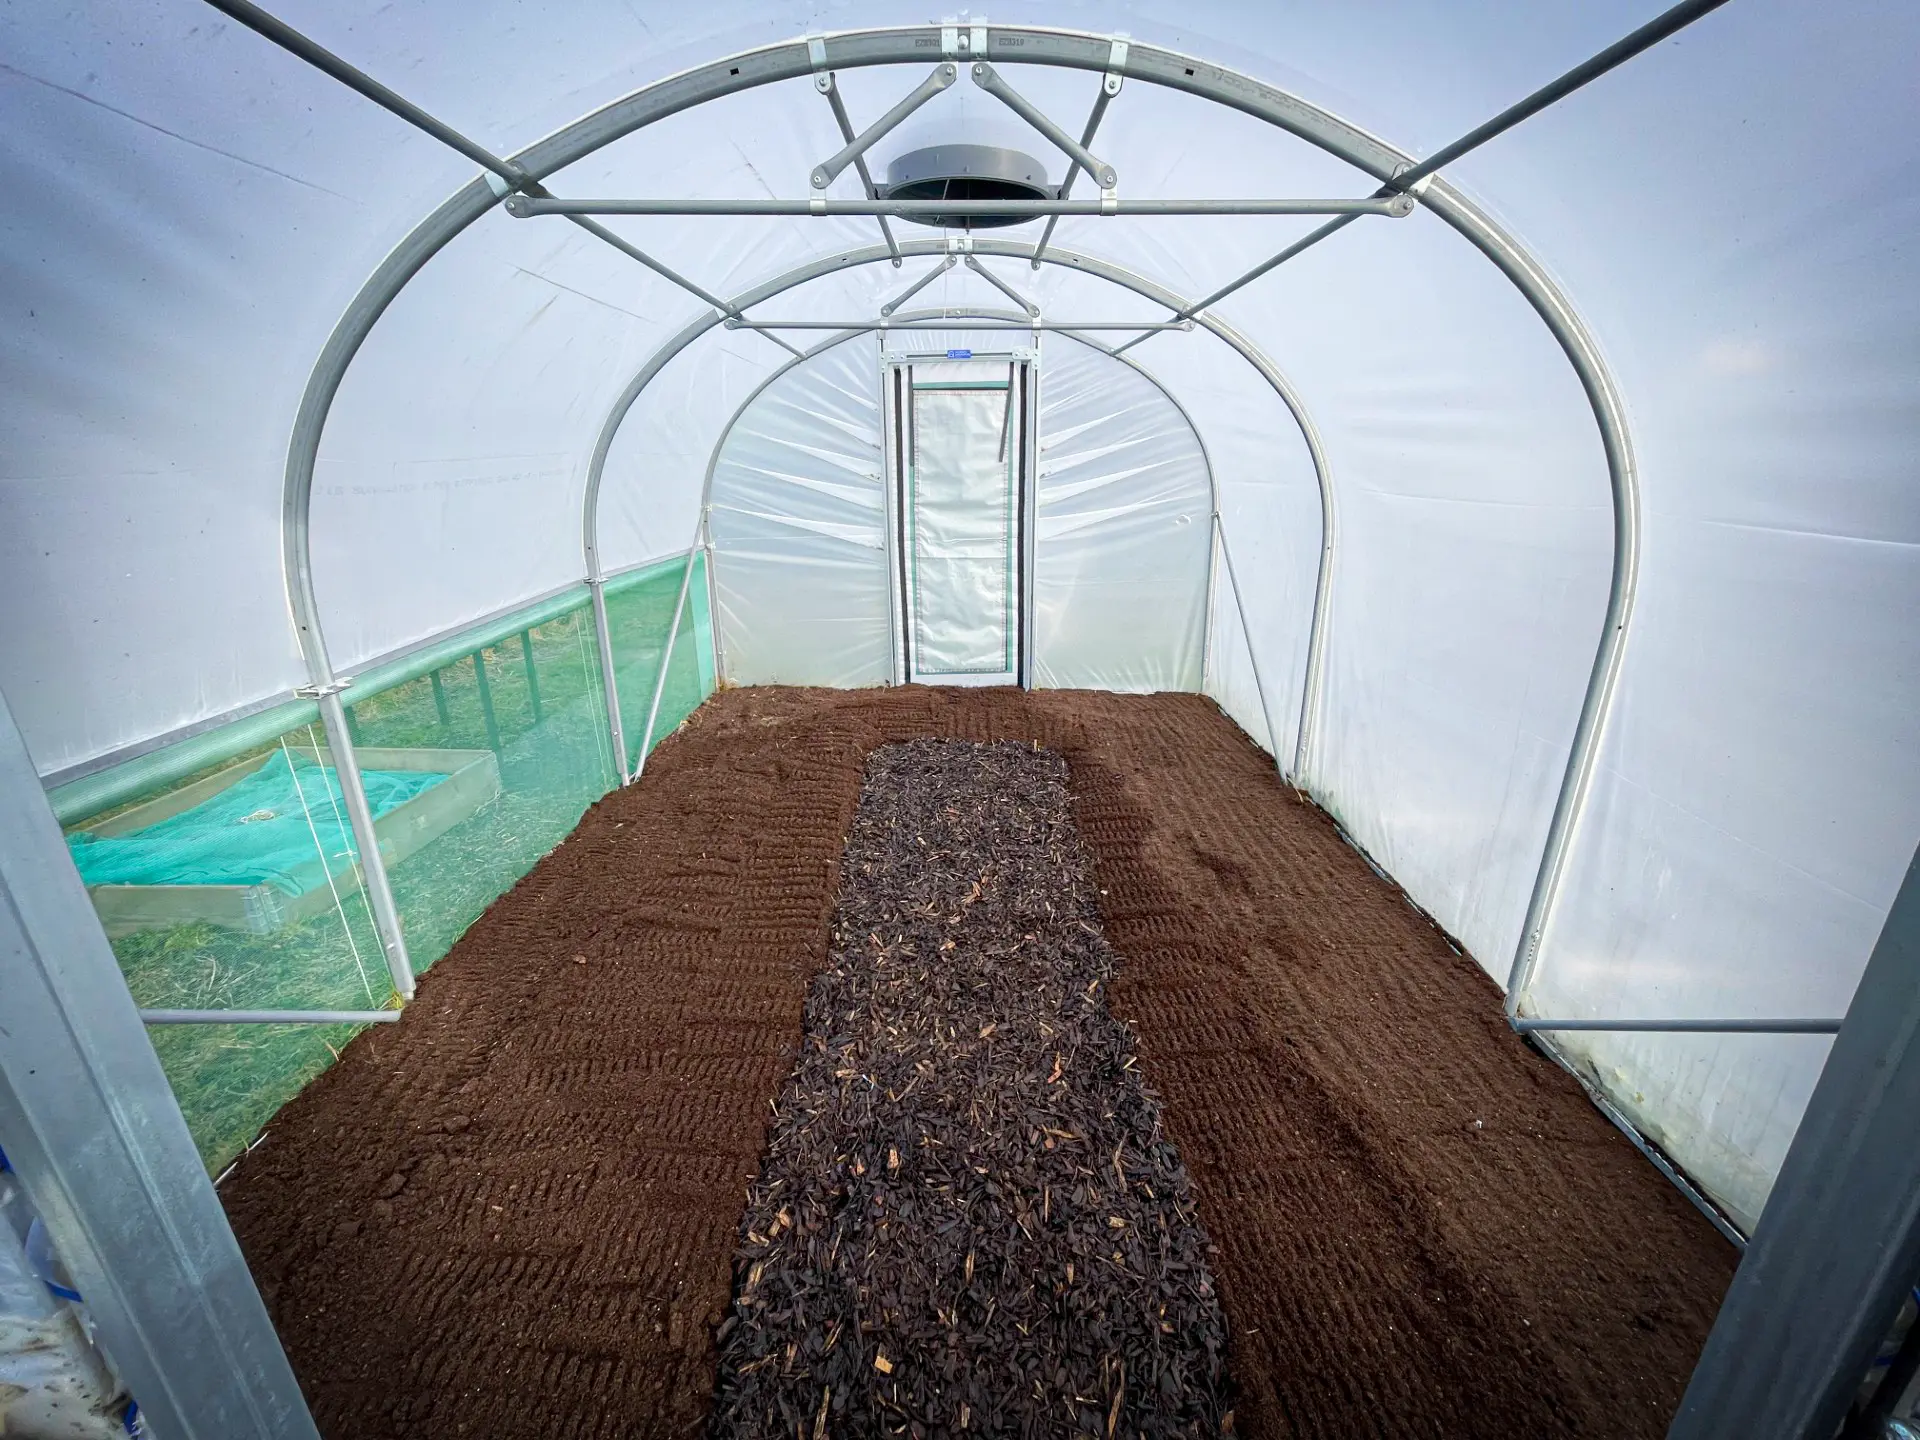
Finishing the Job: Back to Complete the Beds and Path
We came back over the weekend to finish things off properly.
With enough compost to hand this time, we topped up the remaining bed so the full U-shaped growing area was complete. Once the beds were levelled and settled, we added a woodchip path down the centre of the tunnel.
The path does a few useful jobs:
- Keeps the growing areas clearly defined
- Improves drainage underfoot
- Reduces mud being tracked onto the beds
- Makes winter and early spring access far more pleasant
It’s a simple detail, but it makes the space feel finished, and much easier to work in as the season gets going.
A Simple, Effective Winter Reset
This kind of January preparation doesn’t look dramatic, but it pays off all year:
- Healthier soil
- Fewer weeds
- Earlier planting
- Less work once the season gets busy
And crucially, it’s all achievable without digging, rotavating, or disturbing the soil structure you’ve been building over time.
If you’re running an EasyBuild polytunnel (or any polytunnel, for that matter), this approach works just as well at home as it does on allotments and smallholdings.