How to decide which Hoop Spacing to choose...
If you're going to position your polytunnel in an exposed location then you may want to consider 5ft hoop spacings, however, if you’re in a sheltered location then 6ft spacings should be adequate. Steel is strength, so the closer the hoop spacings the more steel and the more strength your polytunnel will have. The same applies to your geographical location. In the colder northern regions the threat of harsh winter weather may point towards 5ft spacings, whereas you may be fine with 6ft spacings in the milder south.
Foundations:
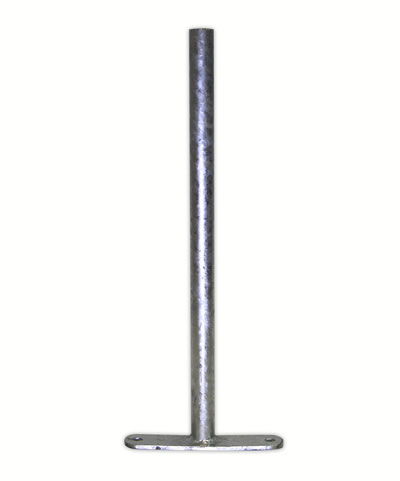
Screw Anchors

Suitable with most soil types, especially clay soils. Avoid only on ground with a high stone/rubble content, peat soils, or loose soil which has been recently disturbed or deep cultivated. Each screw anchor only takes 1-2 minutes to screw in to the ground. Compare this to the time it takes to dig each hole when using either the concreting method or ground anchor plates, and without any of the mess or exertion. In recent tests, we measured the strengths of different polytunnel foundation options. The tests showed that our screw anchors out performed all other methods in most types of soil. A close second place was traditional foundation tubes when concreted in position. In third place, trailing a long way behind, was the use of ground anchor plates (sometimes called ground anchors). They simply didn’t come anywhere close to the other two methods. To give you some idea of the difference, we compared our screw anchors to one of our competitor’s heavy-duty ground plate kits, and found that it took four times more force to pull our screw anchors out of the ground.
Not available with the Highlander Super Strength
Foundations:
Base Plates (for concrete base)

Base plates are only used when fixing your polytunnel onto a solid concrete base. Supplied with fixing bolts for securing in place.
Traditional Foundation Tubes - Concreting method:

The recognised method when using traditional foundation tubes is to dig a hole (35cm square x 50cm deep) and set the foundation tubes in concrete. Considered to be one of the most secure methods. Generally only used where screw anchors aren’t suitable.
Ground Anchor Plates (for soft ground)

Generally only used where screw anchors and traditional ‘concreted’ foundation tubes are not the preferred choice. Our tests show this method is far less secure than both of these other options.
The foundation tubes have a metal plate fastened at the base which sits in the ground. For these you will need to dig a hole (35cm square x 50cm deep) for each tube. You then backfill the holes with earth. These are suitable when screw anchors can’t be used (e.g stoney ground) and where concreting isn’t an option.
Not available with the Highlander Super Strength
Doors & Door Frames
Aluminium Door Frames

Our single door frames have a 0.8mtr opening. The double door frames have a 1.7mtr opening. Due to the extra width of a double door frame they are only available for 12ft (3.66m) and 14ft (4.27m) wide polytunnels. The height of the door lintel is approx. 2mtr.
Sliding Doors

Our heavy-duty aluminium doors are manufactured using easy-to-assemble aluminium sections incorporating our unique ‘W-Wire’ polythene fixing system. Supplied with all of the materials to fully clad it with polythene, or to clad the top half with netting for extra ventilation. New features include robust brush-strips to keep out drafts and maintain a more constant growing environment.
PVC Ventilation Panels

A PVC 3in1 door that suits all weathers and gardeners. Made exclusively for Northern Polytunnels, this door comes with 2 heavy-duty zips for ease of access, a Velcroed panel that can be removed partially or entirely to allow as much or as little ventilation as required and two Velcro tabs that secure your door in place out of the way for those long hot summer days.
To install, simply baton the PVC panel to a wooden door frame.
Door Measurements:
Full width of panel = 95cm
Full length of panel = 208cm
Width of door (between the two zips) = 72cm
Height of door (length of zips) = 194cm
Distance between end of panel and zip = 11cm
Brace Bar Kit

Although often used to hold hanging baskets or to support lateral poles on which to tie up your tomatoes, peas etc, they are more often added to a polytunnel to give it extra strength. Even though we boast that our polytunnels are strongest available, they give peace of mind during severe, windy storms and also when heavy snow is expected. Typically they increase the structural strength by at least 20%.
Additional Ridge Bars

Your basic polytunnel should always have a central ridge bar, but additional ridge bars can be added to either one or both sides of a polytunnel. They will of course increase the strength a little, but the main use for these is to provide crop support along the length of the polytunnel. They can be positioned and re-positioned to the most convenient place for the crop you are growing.
Side Ventilation With Roll-Down Screen

Although doors allow adequate ventilation on shorter polytunnels throughout most of the growing season, additional ventilation is often required. This simple to operate, low-cost ventilation system offers a practical solution during the summer months, especially for longer polytunnels where stale, humid air can build up in the centre of your polytunnel. Simply wind up the polythene side screen/s when required, and wind down when you want to retain the heat.
Can be fitted to one or both sides of your polytunnel. Kit includes aluminium side rail, external polythene wind-up screen, and netting (to cover the ventilation holes). The holes are cut in to the main cover once the side rail has been attached. This kit can be fitted to existing polytunnels.
Roof Vents / Fan
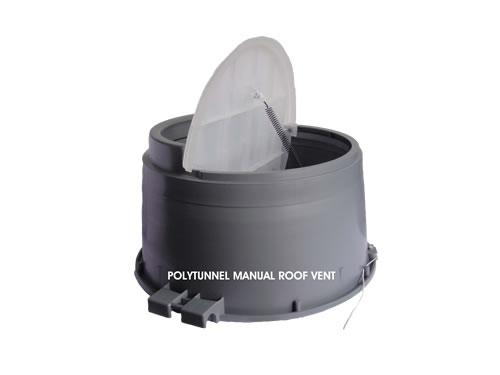
Polytunnel Roof Vent

Easy to install roof vent, with simple pull-cord operation. Used to release excessive heat build-up in your polytunnel without having to open the doors. The spring closing design allows it to be closed tight shut when ventilation is not required. Useful to release heat from your polytunnel when the doors need to be shut (e.g. to keep unwanted visitors out). Simply cut out a 30-35cm hole in your polytunnel cover, insert the fan from the inside in a rotating motion, and clip on to the support bars.
Staging

Our polytunnel staging kits are a low cost solution where a full length bench is required for your polytunnel. We ONLY provide the steel frame, leaving you to provide your own table-top. Some customer use heavy-duty, galvanised weldmesh, whereas others choose timber slats. Whatever your choice, our staging kits provide the ideal framework on which to grow your potted plants. Supplied with fasteners for fixing timber slats. Can be installed in new and existing polytunnels.
Fold Up Bench

This fold-up bench is great for potting up in your polytunnel, and once you’re done you can simply secure it up out of the way. The wooden slats are easily removed to prevent shadowing any plants below. Easily installed in new or existing polytunnels. Several can be linked together side by side to create a continuous bench.
Floor Covering

With less than 5% light transmission, this ground-cover material is an effective weed control fabric. Manufactured from black woven polypropylene (100g/m²) allowing optimum water permeability. UV stabilised for long effective life. Supplied with securing pins.
Gutters

This innovative product comprises of two 10ft (3m) long plastic gutter strips with an adhesive backing. Can be stuck directly on to your polytunnel cover. Although very narrow, these gutters have the ability to collect a surprising amount of water. For longer polytunnels, water can be collected on all four corners by using four gutters (2 gutter packs).
Irrigation
Overhead Sprinkler Watering Kit

Overhead sprinklers which give blanket coverage over the whole area, basically replacing natural rainfall. Simple to install and comes with all the parts required including a hose pipe connection. Often used with an automatic irrigation timer.
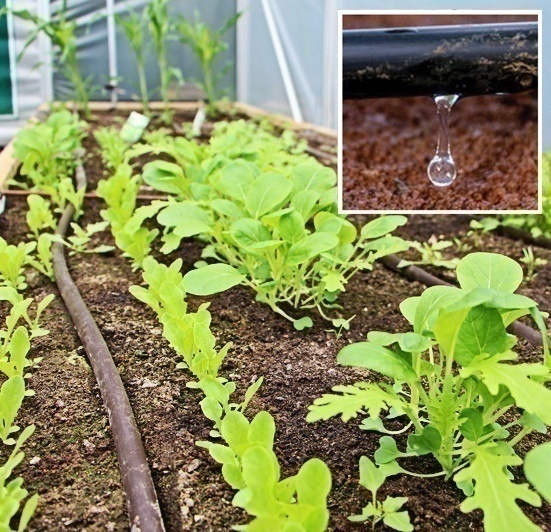
Drip-Line Kit

The ideal low-level watering system, which places the water where it’s required without wetting foliage/flowers or soaking the pathway. The drip-line has emitters spaced every 30cm along the pipe. Supplied with enough pipe for three runs per side, plain header pipe, and all the necessary fittings and hose connectors. Often used with an automatic irrigation timer.
Pot/Growbag Dripper Kit

The ideal solution for watering pots, containers, growbags etc. without watering the spaces between them. Each pot has its own dedicated dripper attached to a flexible 80cm micro-tube. Larger containers may require two drippers, whereas growbags may need 3-4 drippers. The dripper assemblies have a barbed connector at the inlet end which plugs in to a hole on the main water pipe (hole punch supplied). A spike is fitted at the outlet (pot end) of the dripper assembly to secure it in to the soil. Supplied with all the necessary fittings and hose connectors. Often used with an automatic irrigation timer.
